Another DIY and I love how this handmade hanging plant holder turned out!
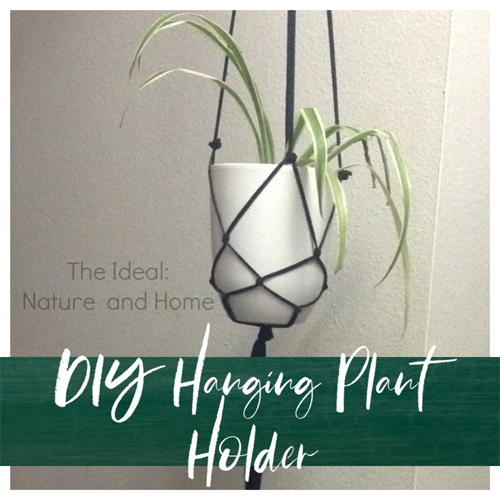
I’m always looking for ways to minimize our waste and this is a great way to use up clothing to its last breath of life and prevent it from adding to the landfills. This little project is super simple and fairly quick to make once you have all the materials.
Supplies
1. Old t-shirt (or clothing with jersey-knit material)
2. Scissors
3. Sturdy, closed loop/hoop
4. Hook, optional
5. Plant and planter/basket
6. Ruler or tape measure
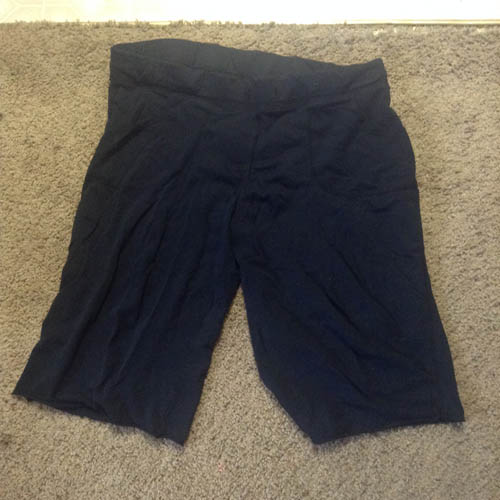
I used an old pair of jersey knit lounge shorts. 
Cut off the any elastic waistbands, pockets, or decorations. 
Then cut out long strips of the fabric. 
Stretch each strip of fabric lengthwise. The sides will curl inwards. 
Take four strips of your “T-shirt yarn” and loop through your hoop. 
Hang your hoop on something so you can knot it.
Directions
1. Cut off any unnecessary pieces from from you clothing item, such as the elastic waistband.
2. I also cut off the seams but you can seam rip them instead, if you prefer.
3. Once all your pieces are divided–I ended up with four panels of fabric–cut each panel lengthwise about a half-inch wide.
4. Now that you have a pile of strips, pull each strip of fabric lengthwise so that it stretches out and the sides curl inwards. Now you have T-shirt yarn!
5. Each of my yarn strips measured around 16 inches once stretched. To make them longer I tied a double-knot with another piece of yarn. For this plant holder, I combined three pieces of yarn so that each strip measured about 48 inches in length.
6. Take four 48-inch strips and line them up together as evenly as you can. Find the middle and loop it through your hoop in a lark’s head knot (also known as cow hitch). Then hang your hoop on something high enough to allow you to work on knotting it.

7. You should now have 8 strips of yarn hanging down from your hoop.
8. Divide your strips into four sets of two. So you’ll have four groups of yarn, each with two strips. Measure where you want your first knots to be. These will either be your first or second knot depending where your place them.
9. Knot each set of two strips together, for a total of four separate knots. Try not to tighten the knots too much or you’ll lose some stretchiness you’ll need to place your plant pot/basket in the hanger.
10. Measure down about 3 inches below the knots you just made and tie another knot with the right strand from one set of strips to the left strand from the set of strips next to it. Do this three more times until you’ve made four knots again. The pattern will look like a chain link fence pattern.
11. Repeat Step 10 to make one more round of knots. This time reduce (or increase) the measurement below the previous knots. I would place the pot you want to use to see how it will fit in your hanger. This gives you a good idea of how it will look and you can decide whether you want to increase/decrease the spacing.
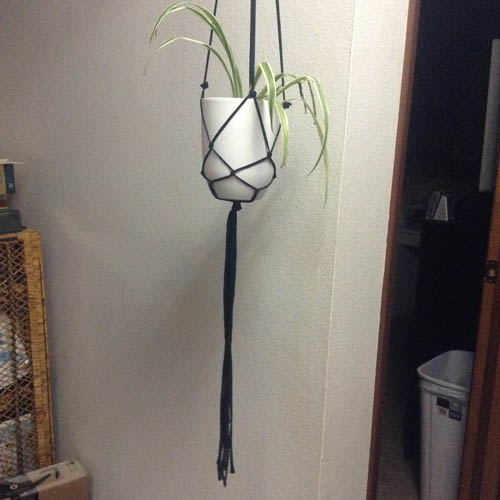
12. Lastly, measure down 2 to 3 inches from your last knot (fit your pot again) and make one big knot with all eight strands of yarn. You can either cut off and even out the length of your yarn strips or leave them as is.
Note: You can make your yarn thicker or slimmer depending on how wide you cut your fabric. I suggest test cutting strips a few different widths and stretching it before cutting all of your fabric.
And you’re done! I know it seems like a lot of steps, but once you do it once making a second one is super easy because we didn’t use any complicated macrame knots.

Now my sad little spider plant can keep safe and away from curious kitties!
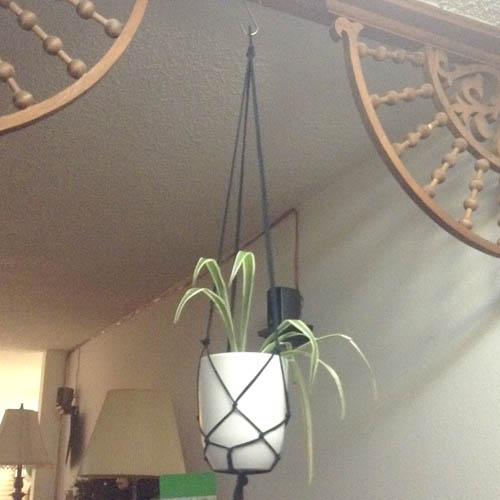

But where to put it?

Just with the two back panels of fabric I had enough yarn to make a second plant holder. This one is a bit shorter but still looks great. The size of your planter pot will change the design of your hanger. I used the same style of knots on this plant hanger as the first one but because the pot is more round at the base it kind of closed the lines or opening of the bottom strands.
Let me know if any of you recreate this project. Until next time! :)


Turn your knowledge into profit. click here and learn how to create and sell digital products that can generate passive income.